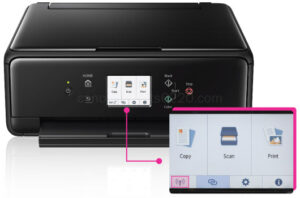
How Do I Connect Canon TS6220 to WiFi on Windows and Mac?
Do you really want to enjoy the high-speed and the best printing quality with the Canon TS6220 printer? If so, then you need to proceed with the canon ts6220 setup process. It enables the user to print high-quality documents and photos with rich quality as well as resolution. The duplex printing feature enables quick and easy printing. You can easily connect Canon printers to the compatible iOS, computers and smartphones and can print the documents from it in just a one click. Wondering how to set up your Canon TS6220 printer then scroll down and check out the steps one-by-one to set up your printer on Windows and Mac devices.
Steps for the Canon TS6220 Setup on Windows
Now the process of the Canon TS6220 wireless printer setup on the Windows device becomes simple and easy. By using the latest available drivers files, you can easily proceed with the wireless setup. Here are the steps for the Canon TS6220 Setup on Windows:
Step 1: The first step is to connect your printer to Windows by using a USB cable. The USB cable helps in establishing the connection to start the wireless setup process.
Step 2: After that, you need to download the compatible Windows wireless setup file on your computer.
Step 3: Thereafter, run the setup file and follow on-screen instructions to go ahead.
Step 4: When the setup wizard asks then enter the passcode of the WiFi network.
Step 5: Now, you will see that a secure wireless connection has been established between the network and printer.
Step 6: Next, disconnect the USB cable that connects the Canon TS6220 printer to the computer.
Step 7: Go to the Control Panel from your Windows device.
Step 8: Click on the Devices and Printers option.
Step 9: Now, the Windows shows the list of devices available nearby you and ready for the wireless connection.
Step 10: Choose the Canon TS6220 printer name from the displayed list and then add it to the Windows wireless.
Step 11: At last, install the compatible printer drivers on your system to complete the Canon ts6220 wireless setup.
Instructions for the Canon TS6220 Setup on Macintosh
Now, the Canon TS6220 wireless printer setup is easy by using the wireless setup file. You need to connect your printer temporarily with the USB cable to the Mac to download the file to the computer. Here are the steps for the Canon TS6220 wireless printer setup on Macintosh:
Step 1: The first step is to download the latest Canon TS6220 wireless setup file on your Mac device.
Step 2: After that, go to the wireless setup wizard. Follow on-screen instructions to complete the installation.
Step 3: A pop-up window displays on the screen saying to enter the WiFi network name and the password.
Step 4: Thereafter, complete the setup process by establishing the connection between your wireless network and printer.
Step 5: Disconnect the USB cable connecting your Mac device and printer.
Step 6: Tap on the Apple icon located on the top left corner of the Mac device.
Step 7: Click on the System and Preferences option to access the Device option.
Step 8: Under the Devices menu, you will see that your Mac device will display all those devices that are ready for connection.
Step 9: Choose your printer name from the displayed list.
Step 10: At last, add the printer to the Mac and print the document wirelessly.
By following the above instructions, you can complete the canon ts6220 setup wirelessly on Windows and Mac devices without facing any difficulty. If you need troubleshooting tricks for the canon ts6220 wireless setup then you can contact our technical team for an immediate resolution of the issue.


Comments
Post a Comment